 |
| One of the boards I made. |
So, on to the shopping list! This is a break down of what I used for the example mat.
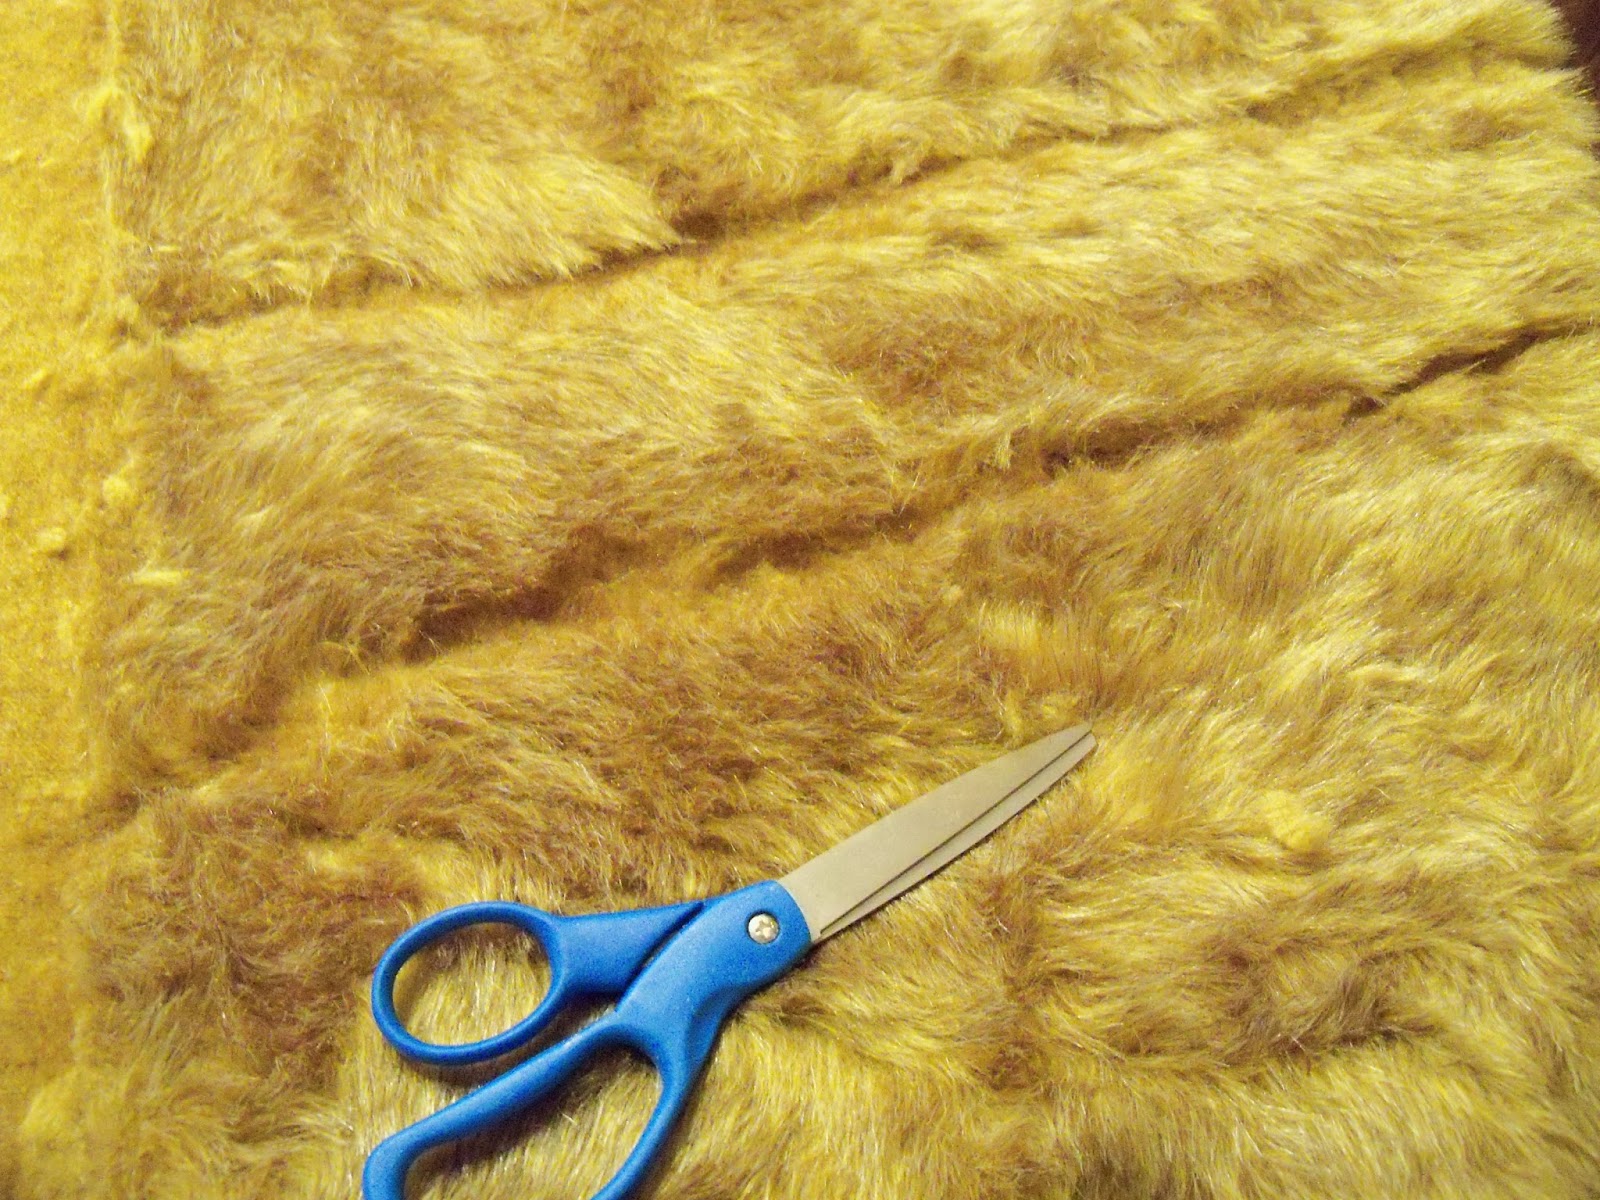
1. The Teddy Fur.
You can get this at most Fabric shops. I tend to use a medium brown, but you can choose other colors. I am thinking of working with white for a snow board. I will have to test that out. Fur height can vary. I would choose based on your plan. If you don't have a plan in advance, make one! Otherwise, this project won't be as much fun. Also, have a smaller piece to experiment with. This will show you how your paint ideas work out before you apply it on the real deal.
2. A electric shaver. If you have one already that you use for your hair, don't use that one. I went out a bought a $30.00 Wahl one used for dog grooming. It will cut better.
3. A cheap comb. The most important tool!
4. Acrylic Paint of your desire.
5. Spray Paint in satin or flat. Gloss can be used, but only with bright colors.
6. Spray Adhesive. 3M makes a good one.
7. A Rubberized Spray.
8. Cheap brushes.
9. Scissors.
First thing is first, have your plan. This is just a quick drawing of what I am doing for my friend's mat and this tutorial. He said he wanted to be more farm-like, however, he bought some 4ground buildings that are more like row homes than farm ones. I, also, decided to add more space for the homes, in case he decides to buy a house or two more. Since this is going to be a fixed mat, it is good to have a visual reference. I tend to grid things out and, sometimes, color in my reference sheets. This time, I decided to skip it.
 |
| My planned layout. |
Next, start working on the fur. While you are already thinking it, let all the Teddy Bear jokes out before we start! The most important thing to do for preparation of the fur is to run through it a couple of times with the cheap 50 cent comb. You will be removing a lot of the excess fur that your mat will have. This is going to be a common event in this project. You might not want to touch a comb again for a couple of days after you finish.

 |
| You will get a lot of this! |
You can save the excess fur for future projects, such as, thatch roof material or making hay stacks. This also could be used for bushes of trees. Keep it; throw it away! The choice is yours.
Next step, use you scissors to map out you mat. I cut the outline of the roads and shorter areas of grass. If you plan on different levels of grass, I would cut the shape of the lowest layer of terrain first, then, shave it. Then, cut the next level and repeat. If you got the dog grooming version of a shaver, you will notice the different levels that come with it are really helpful.

 |
| Different adjustable levels are a good feature to have for your shaver. |
 |
| I have three levels of height. I can always freeform shave or cut with scissors later. |
After the cutting, you have two options on where to go next. One, you can prepare you roadways. Two, you can start painting. I started with the second option to get the ball rolling, since I will be making two more of these, at least, before Christmas. However, I will show you roads first.
When I make the roads, I take it outdoors for ventilation and sun drying. I use Flex Seal for my rubber spray of choice. There other ones out there that are cheaper, but I like the quality of Flex Seal. I do not spray a lot of it down. I just want enough to lightly cover the fabric, since it is going to be a dry dirt road. You can spray a lot more to make a muddy effect, which turns out nice. I usually let this dry and spray paint it a brown color.
 |
| Flex Seal and Spray Paint I used for wheat fields. |
 |
| Flex Sealed roadways. |
After a brief drying period, it is now time for the sand. Now, I did not list this on the shopping list, because I just go outside and get it. Where I am in the North Carolina, it is called the Sand Hill Region. Sand is easy to find. But you can use other materials. The great thing about sand is that you can use it on other projects like basing. I like sand for two qualities it has. One, it absorbs color like salt. You can mix glue with color and the sand tends to absorb the color. This has a great effect for making rubble bases using a brick color. Two, you can leave it natural or dry brush over it. I apply the sand using 3M Spray Adhesive and let it dry outside. Just place a lot of sand where you want it. The more weight of sand gets more of it to stick. When it is dry, I shake it out. What stays is your road. You can seal this then and there, but I like to finish painting first in case, I have to correct something.
Okay, back to painting. You are going to see how I jumped around on steps just based on the roads. It happens. When I paint the mat, there are two ways to go about it. There is spray painting it and hand painting. I do both. I do not have an airbrush, so I use the normal spray paint you get from the paint department. I use mainly flat and satin for color shades. In this case, I used a Gloss Citrus Green for this mat. For whatever reason, it comes out yellow on fur, but not on anything else. You can do the whole project in spray only like how I first started working with teddy bear fur.
*Important thing to know about spray paint types, satin and gloss dry different and take longer. You may have to run through the comb a few more times for this spray paint type.
If you go with the spray paint option for quick large areas, spray about 6" to 8" out. Before you spray, run the comb through out the fur. Otherwise, only one side is going to get the color and you will go through more spray paint. The same goes with spraying on windy days. In my case, the wind seems to only start up exactly when I start to paint. When it dries, run through the mat with a comb, again. This will break up the spray as it harden and rid of any clumps. The same goes for the air brush, though, not as quick.
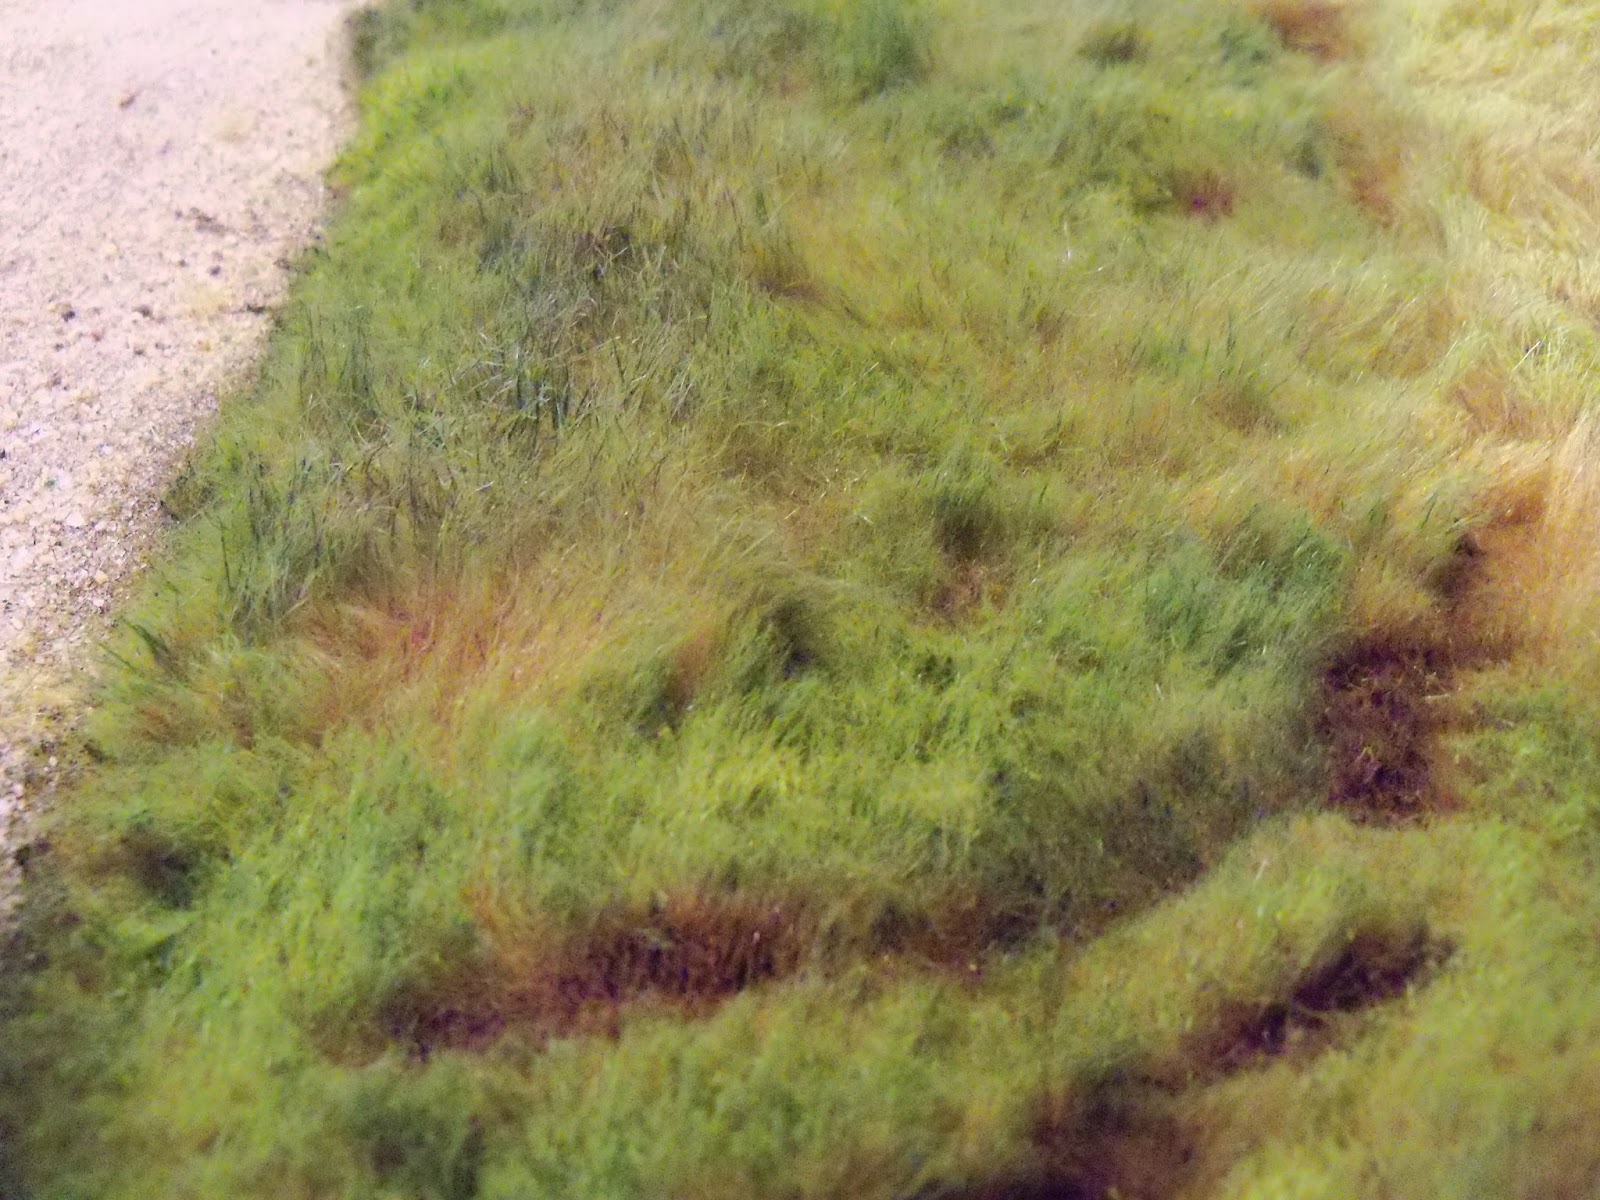
Hand painting is a lot longer, but that also depends on the details you choose. On this mat, I used six different greens, one yellow, one light flesh color, one dark red, and a darker brown. The name of the game is blending in your terrain. I used a lot of photo references of fields to get the colors I wanted for a Normandy July, early August look. And with blending, I use the comb the whole way through.
For the starting point of my work area, I began with using the darker brown to paint the ditches. I planned to make them look muddy. I used a large amount of paint in those areas to dry like mud. This is the only color I did not blend at this level of grass. I had the ditch shaved down just like the road.


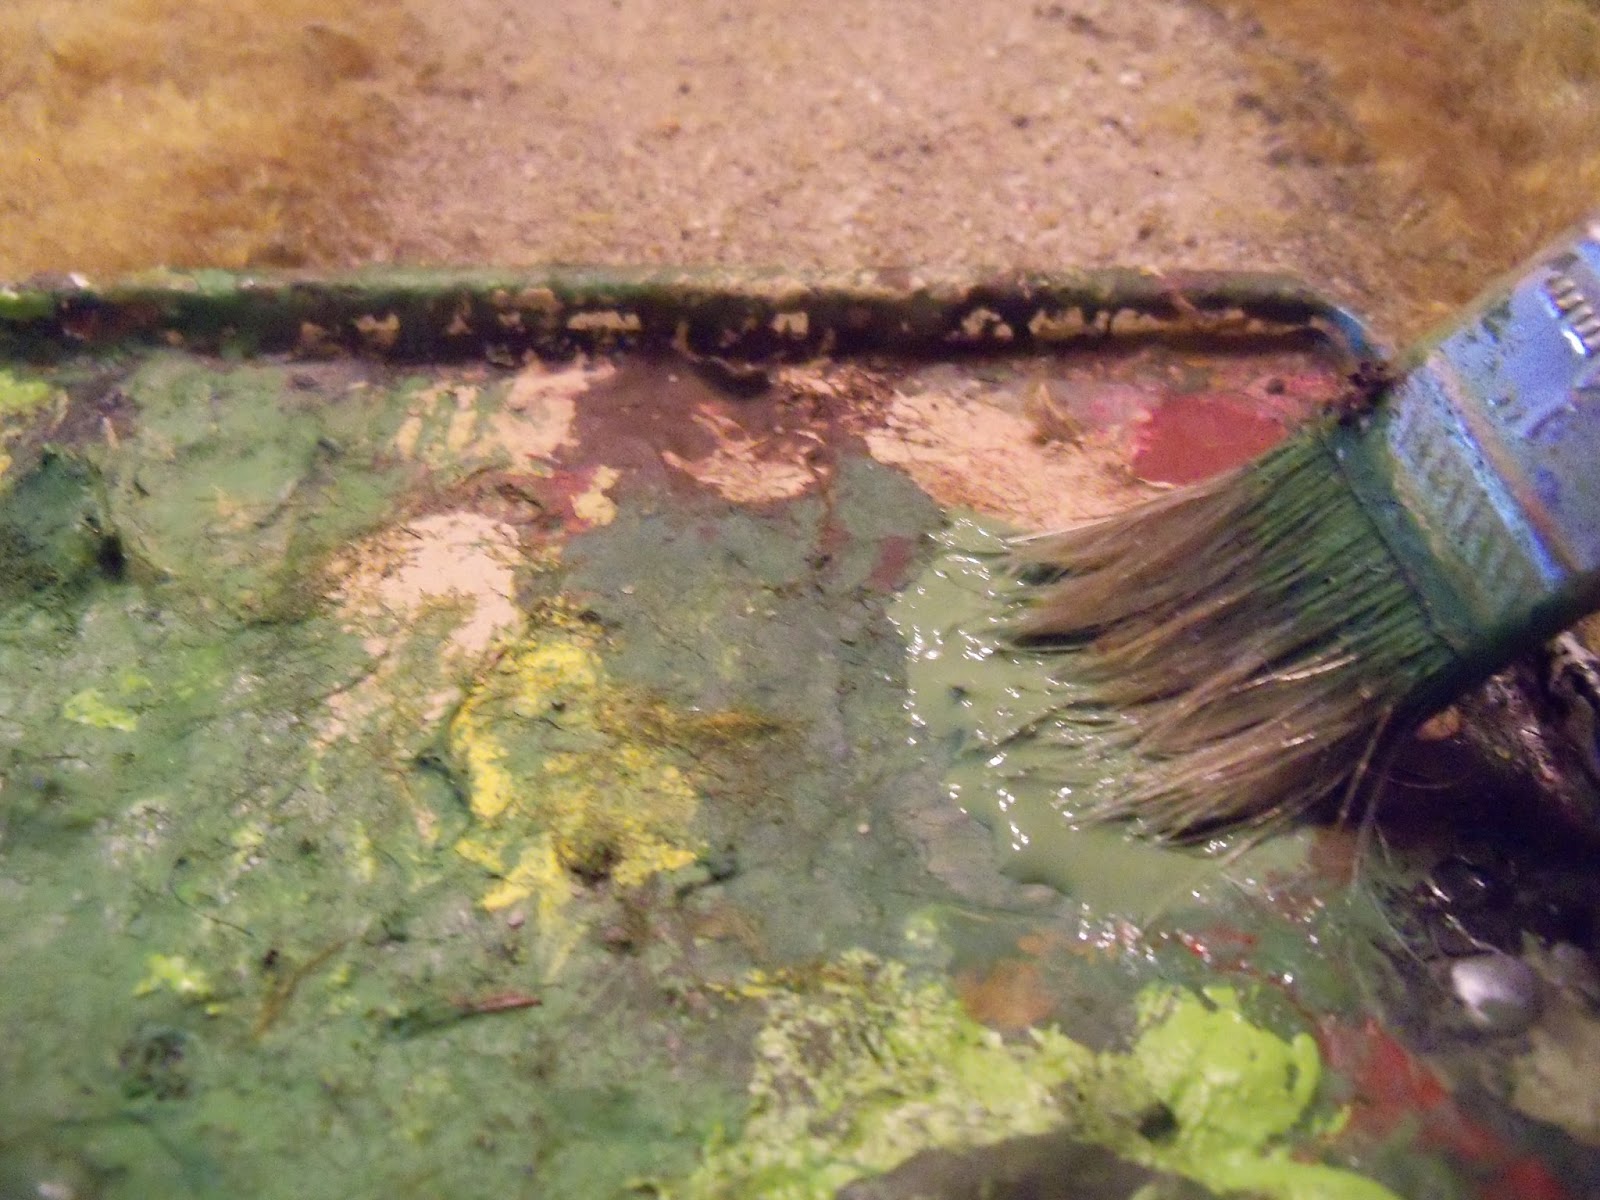
The next part is the taller grass. With a brush I just paint over the grass with a little paint. If you put too much on, it can be fixed with the comb. I use the comb to blend the color in. I saw on other ways to add color in, everyone used their fingers. The comb is much easier for blending. I promise!
 |
| As you can see, I have my trusty comb, my crappy brush, and one of the greens I was using. |
 |
| Lightly adding paint. |

 |
| Blending with a comb. This is usually done fairly quick. |
When you get a main color down, you can go to other colors and repeat. The great thing with using the Acrylic paints is that it is easy to work with. If you do not like how a color is working out, you can add other colors and blend over top of it. The paint dries fast, but not to the point that you cannot modify the fur. When you are good with the main colors, you can add highlights fairly easy. I use a little brush and dot areas of interest, then blend. Below are some of the examples.
 |
| The strange flesh color I used. I know that the paint was not labeled this. I took off the label when opening. |
 |
| This is not really a highlight, but is adds interesting color that is as random as nature is. |
 |
| Highlighting by add quick color on grass tips. |
 |
| A little off road drive. |
 |
| Some 28mm Panzer IV's I will eventually finish painting taking a drive on the finished product. |
 |
| This is another part of the mat with building and hedges. The yellow lighting makes the color a lighter green than it is. |
 |
| With a 4ground building. |
Wow - this is spectacular, mate. Thanks!
ReplyDeleteAm I right in thinking that the whole mat starts off as a huge swathe of fur, into which you cut and shave either different heights of fur or right down to the backing material?
- Drax
(Via tabletopbattle on fb)
Yes, this is one giant piece of fur at 5' x 6'. You can make them smaller. I also made a lot of smaller fields this way for generic boards. There are a lot of options when you plan it out.
DeleteThe addition of the comb is very nice!
ReplyDeleteThis comment has been removed by a blog administrator.
ReplyDeleteI had two quick questions:
ReplyDeleteWould you be able to tell us exactly where you purchased your brown teddy bear fur? I find things in craft stores like Joann's and Michaels - but they look absurdly ridiculous. Nothing like this fur.
I am also wondering about the roads - you use the flex seal, followed by 3m Adhesive spray with sand over that - anything to seal that final bit of sand in?
This is stunning work! Thanks for the lessons!
Thanks for sharing this article. I found it fantastic. Find dog grooming classes near me to learn the basics or advance your skills. These classes cover everything from grooming tools to styling techniques for your dog. Keep sharing. Thanks.
ReplyDelete