Showing posts with label Terrain Tutorial. Show all posts

Sunday, April 12, 2020

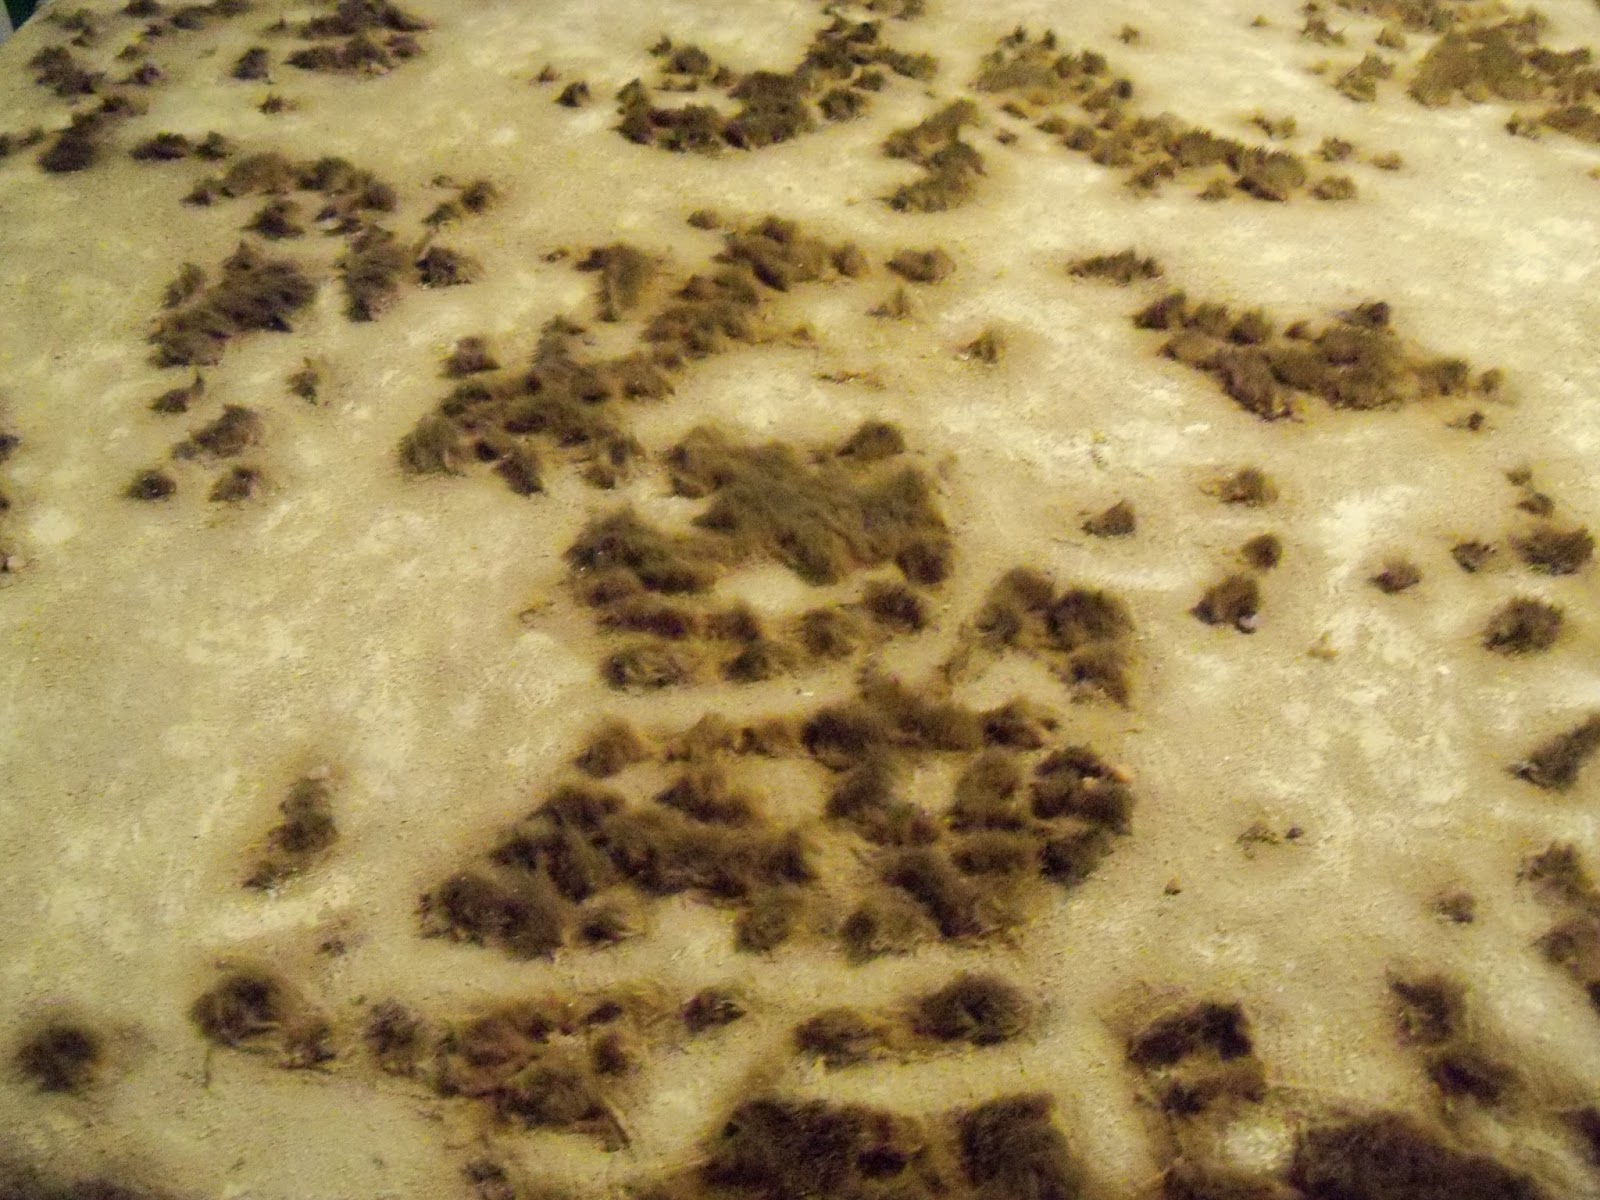
A Terrain Day: Modifying the Killing Fields Fur Mat


    This post is of a terrain day before the previous post. I have no idea how I forgot to post it, but I still managed to post it all over Facebook. So slightly related to the other 15 mm post, I had a commission for a 15 mm Flames of War mat around this time last year. Part of the payment was for X amount of money and two Killing Fields Terrain mats. As you can see throughout this blog, that I kind of do not need these, but I took them anyway. I think I was planning on making a Mirkwood mat for Lord of the Rings as a mental plan, instead on buying a whole bolt of dark brown fur just a mat or two. Honestly, with that much fur, I would have found a project for it some way of another.
    Anywho, I finished another commission and felt compelled to try out a modification. One of the Killing Fields was in my way to another fur section I was after. So I felt like making a board for someone for a game scenario he had come up with. Seek the Battle of Prestonpans 1745 for the mat I was making. Our friend, Eric was running this game at Siege of Augusta 2020 that I played in. He has mentioned how he would like me to make him certain projects, but he never seems to get around to committing to a project or even gaming at our house when he is less than an hour away. He is one of our gaming friends that my wife is described as a member of the cats that she has to herd at conventions. So is this mat really free, no! This is purely a bribe to get him to come over a play. It has not worked so far, but I am about to lay it on thick in this post about my trials and tribulations I have gone through on behalf of our gaming friendship.
     For those who have already seen my work and know the basic premise of how I do what I do for fur mats, I usually use the following tools: Wahl Dog Grooming Shaver, a 99 cent comb, scissors, and a basting brush along with paint. With the Killing Fields mats, these tools do not work for their mats. At least not all of them. When you look at their product, they use a dark chocolate brown base for their fur. Then, they have a lighter green as their highlight color. In fact, it looks a little darker that their website has it, but they are consistent. Both  fur mats I have of their is exactly the same. Another plus is that their is very little excess fur to their product. These are all plus for a basic mat that you are not modifying. However, the fur that Killing Fields uses is thick and not as receptive to paint. My Wahl Shaver took 25 minutes to get through four inches of fur to make a road. I accomplished what I needed to do with scissors. And for a moment, I thought I broke my Wahl Shaver. Since I have been making fur mats, I have gone through $250 worth of shavers.
     After cutting to where I was happy with the fur job, I went to painting. When you use a dark fur, you tend to have to go with brighter colors for base color and highlights. The darker color tends to be a base for wet ground like for a wet Spring or Winter. The lighter the color, the more it will pop for color. Most of the fur I have dealt with has been pretty forgiving for absorbing colors. The Killing Fields mats do not do so well. I had to cake on colors and comb it out. In other words, use actual elbo grease to get my effect. It was not the end of the world to do so, but it was a longer project than it needed to be. It was about two days worth. Anyway, below are some more pictures of the results. If you are reading this, Eric, the bribe still stands!


It is not often I can have a before and after picture.


This was just a picture to prove that they were both the same color starting out. 

Sunday, November 25, 2018

Terrain Tutorial: Hedgerows Revisited.


     Back to the dark photos of my camera and some terrain making. I am usually finding myself making some terrain here and there for Kalissa and I's games when we are not making them for other people. In this case, I decided that we need to upgrade our standards for our Bolt Action Tournament terrain. It is not that most of our stuff is subpar by any means, but we have been using hedgerows from my first terrain making projects and they are showing their age after seven years. This new process of hedgerows is a combination of past work concepts and a little bit of new ones. So let's have it a go!
     First, we need our materials. Below are the following things you will need if you chose to make the same type of hedgerows.

  1.  Hard Board.
  2.  Tall screws. These are based on the height you want.
  3.   A drill.
  4.   An  orbital jigsaw.
  5.   Hot glue gun.
  6.   Super Glue.
  7.   Glue Sticks.
  8.   Scrub pads.
  9.   Sea Foam armatures or lichen
  10.   Leaf Flock like SuperLeaf or Noch Leaves.
  11.    3m Spray Adhesive
  12.    Black Primer Spray Paint.
  13.    A Metal Fork.
  14.   Light Green Spray paint (optional).
   The first item on our list is the hardboard that you can pick up at a hardware store in the lumber section. This also can be found in some craft and hobby stores, but you will pay more for it. The board I get is 2' x 4' at a 1/4" thickness for easy cutting. It might cost around $5.00 per sheet. It is great for making all types of bases. I used hardboard to make all of my American Civil War stands and woods bases. You can use an orbital saw to cut various shapes to make your future gaming boards more tactically interesting rather than sticking with round or square bases. This also opens our hedgerows up to new natural shape possibilities. The picture below illustrates this idea.


   As you can see, we can make some different types of angles and curves that a lot of terrain avalible pre-made tends to forget about. This picture is also part of the next step. I decided on a certain height for my hedgerows to roughly be and bought screws around that height. In the shapes I cut out, I pre-drilled holes for the screws and screwed them in with the points sticking up. I did not bother with dolling the tips or cutting them, in case I need hedgerows to defend myself in hostile situations. Actually, they are going to be covered with scrubbing pads. Besides, I would hope that gamers out there are not slapping your terrain at will.
    After you have made you shapes and added screws, it is time for you main base for you hedgerow. You take one of the scrubbing pads and score them with your fork that you plan on using on both sides. The plan is to break up the fibers to make them more fluff. Then, you can tear them and shape them more to your liking with out having boxy  pointed edges. Below are some photos of this.
This covers about two screws at about two inches apart.
     When you have done this to enough scrubbing pads, you can now hot glue them to the screws and base. Note: some pieces might rip off during your scoring. Keep those, because they might be useful for filling in areas. Also, I have been told that you could place scrubbing pads in a blender, but I honestly do not think that would be good for the blender or last long enough for the amount I plan to do. Below is were we are at in steps after some hot gluing.


       On the picture above, some of us my just flock this. And in reality, it would mostly likely look fine. But it is the extra steps that make a difference. This is especially true when you do not have that much more to do. This is where the Sea Foam armatures and/or lichen come to play. Lichen is pretty easy to find and cheap. You can get it in most every country in the world. The Sea Foam I use is from Scenic Express and cannot be shipping to a lot of countries. I know Australia is one of those on the list where it cannot be imported. Essentially, the Sea Foam is a dried up plant. I am sure there may be some other options in your local area.
     Either way, the Sea foam is to give the hedgerow a more natural 3-D look. I just hot glue them in various spots to break up flatter surfaces or areas the need work. This is useful for hiding some spot you might not be satisfied with. Once, you have your armatures and such glued on, you want to take it outside and prime it. You do not have to used black. Brown is also effective. The results of the before and after priming are below.

It looks like a weird sea cucumber!
You can also add happy trees to your hedges like Bob Ross did in his paintings. " I think a happy trees likes living between these bushes!"

The black makes sure there are shadows and it blends it all together.
     Now, we are really for a sign of spring. Let us add some leaves. Some people I have seen on Facebook groups like the Terrainiacs like to use hair spray. This does work, but I like using 3M Spray Adhesive. I use the 77 version. 45 is common. 90 is the strongest. It is pretty simple to work with. You spray you hedgerow until it looks like it was left outside in a frost. Then, you simply add you leaf flock. I tend to mix some different colors to give some depth. I am sure this process can work with smaller scales as well.  Below, is the results you are aiming for.


       As for optional paints, I find that light greenish yellow spray paint lightly sprayed over the top of the leafs gives a good impression of sunlight. I have not do this on these yet, since I plan on doing 60 feet of these. Either way, remember that you can do this. And hey! If you make too many, you can always sell some on eBay to get your material costs back! Just remember to have fun and you will be happy on how your project looks on the tabletop. Thanks for reading. 

Friday, December 8, 2017

Tree Life: The Making Southern Pines My Way.

   
  As I had mentioned in a previous blog post, I was to going to write up this tutorial about tall southern pine trees. Due to my iPhone being an asshole, some of the imagines are going to be sideways and upside down for this. So for those who were quick reading, you are probably laugh at yourself on the re-read of this thinking that you were drunk. However, this is really a combination of the iPhone acting up and my computer refusing to save my photo rotations. I will just count myself lucky that there were any saved images at all!
    Back to the task at hand! Things you will need for the basic pine woods are:

  1.    Tempered Hardboard or MDF.
  2.    An electric saw to cut the board in shapes. I used a cheap jig saw.
  3.    A small mini-hand saw for cutting dowels.
  4.    An electric drill with two sizes of drill bits. Sizes of bits depend on your needs.
  5.    A Phillip's Head Screw Driver.
  6.    1/2 wood screws.
  7.     Wooden dowels. Sizes vary on your needs.
  8.     Woodland Scenic Large trees or Sturdy branches that are similar.
  9.      Duct Tape or Masking Tape.
  10.     Super Glue. I use Loctite Control Gel.
  11.     Sea Foam of Sage Tree kits. I get them from Scenic Express.
  12.     Static Grass. I used 57.7 cm static grass. The color does not matter.
  13.     Two tones of  flat green spray paint  (hunter green and lighter green) and dark brown flat spray paint. 
  14.  A knife you can carve with.
     It seems like a lot for this project. It is! However, you can make a large amount of woods it you don't run out of everything like I did. I did not fully plan my venture. The good thing is the I have a better idea on what I need to complete my mission for the future.

    In starting the project, drew out shapes I what the bases in on the Tempered Hardboard I bought. I made it a point to not make the shapes too small or have too many dramatic curves, because I was going to cut this with a Jig-saw. There is no need to break blades or injure yourself doing this. Below was an example of a shape I cut out with it.

As you can see, I changed my mind on following the lines. 
      After cutting the shapes out, I decide to shave down the edges. I could do this with an electric sander, but the way I plan on basing it is not going to need to be perfect. I just carved the edges off with a knife. You will also note in the picture below, I used the other side with the rough texture. This can be used for basing with plastic or wood filler to built hills up if I should desire to. Below are the images of the steps!

I would suggest using a stronger knife if you decide to go with MDF instead of the Hardboard.


   Next, it is time for the dowels of the project. You want to size this up next to the miniatures to get an idea on how high you want them. Southern pines can be 40 to 80 feet in the air. The troops that I want to move through the woods, I want to move through without worrying about hands or figures hooking branches. I also have to consider the flags as well. You can make the dowels for preferred height. Also, keep in mind that you might trim off more branches. After this, I take the little hand saw of mine and cut the dowels into different various sizes around the height I want. This gives the various heights of trees like in nature. The saw you can get for $3.00 or a little more at a local hardware store.
"I think I will call him Mini-Saw!" Yes! Another sideways picture!

And this one is upside down! I used some smaller dowels, so you could get more than 5 pieces.
       Now that the dowel pieces are cut, I drill a hole on each one on the side I want for the wood screw to go into. I also use the same for the hardboard. Because I am using Woodland Scenic Trees, I used 1/2 wooden screws and I drilled the holes using 3/32 drill bit. Once, I drilled holes in everything, I mounted them securely together. It is after this, I switch to a 7/64 drill bit and drill holes on the top of the dowels. I move the drill in and out a lit for a tad extra room for the Woodland Scenic trees in stick into. 

Another upside down picture, but you get the idea.

The mounted dowels.

The hole added to the top.

And as you can see, they stick right in!
         After being satisfied with the results, I glue the trees in. There is no written rule that you have to do this for or the next step. If you travel on the go for wargaming, it might be beneficial to not do this for easy storage and break down. However, I am trying to make more permanent pieces. To get the trunks a more unified look, I decide to glue the Woodland Scenic trees down to the dowels. This can also make the tree more stable if you want more top heavy trees. I use tape to wrap over the joint seams. You can also go over a few times to build up a thicker ore tapered trunk. Now, I used duct tape, because I was lazy and I saw in the room. You might get more textured results with masking tape. But, since duct tape is rather smooth, I roughed it up with with the back end of scissors to get some texture. You could also, coat it with glue and add sand or saw dust for texture purposes. In either case, it is important to have sort of texture for when you later dry-brush this.

My duct tape trees!

This is after I roughed them up for talking back at me!
     When you got your trees ready, you can now mount the sea foam branches. I am not going to say that this is the easiest of tasks. I use Loctite Control Gel for a good reason. I can usually count to 30 and I can move on to the next branch. Sometimes the times can vary, because some the Sea Foam branches want to bow out. I just say to be creative with your colorful language while you are being creative. And really use colors when around children. Son of a Blue, Purple, Green!
     Really, it is not too bad. It just takes a little time and patience for the first branches. After you gain more confidence, it will start to come natural.
Some with the Sea Foam branches.

In this, you can see I trim off some of the lower branches. With some of these tree, less can be more.
    Now, I did not have the rest of the photos saved for the rest of this. The earlier tree making tutorial I made covers mush of the same things done for these trees. The difference is that I used static grass. Now, the color of the static grass is not that important after I add it to the trees, because I found I can just spray paint that. I go over it with a darker green as the base. The lighter green is from highlight that I spray lightly from afar. You can also use Superleaf or Noch Leaves to other types of trees. There nothing saying you cannot apply this method for other terrain ideas. Below where some recent results.


As you can see, this is a work in progress for a Cypress swamp. 


Friday, April 28, 2017

Sicily Project: Shermans, Shermans, and Yet More Shermans!


      I figured that we all should view our newest Sherman Tanks in their natural habitat: the table top. I had found some late night time to paint and mostly finish up these tanks. It is only listed as "Mostly" done, because I might add some storage and stuff to them. Also, I found that I was not thinking strait, and glued the tracks on backwards to of the tanks. I have not painted that one, since it was hanging out in the freezer. An explanation of the freezer is that extreme cold weakens the adhesive stick to super glue that has already hardened. I have since, took apart the tank for reassembling. This process works great with metal and resin; not so much with plastics.
      As in the previous post, I found out after my order that I did not get the correct Sherman Tank for the Canadians. This is a minor problem, which got me thinking during my painting. I figured that I will eventually conquer a desert tank game in the future, so I can change them. This idea resulted into time consuming, hand-crapping, hand-painting the models squadron symbols! I figured that that would save money and challenge myself to possible do it. My hands hurt while typing, and I now, hate the shape of a circle! I will be over it, but the previous sentence has only been typed out three hours, since I had finished.  They still came out great. So here are some Sherman tanks frolicking across some terrain to meet up with some Panzer III friends. Enjoy!


Friday, September 30, 2016

Teddy Bear Fur Tutorial: Another Link.


This was just a Normandy Chain of Command game. 


     I have been making quite a few mats, lately. Whether is has been just for fun or a commission work, I have found there was a lot of interest in what I do. At this point in time, I get an average 50 people looking at this blog under my Teddy Bear Fur Terrain. I think that is pretty nifty! But what makes this more nifty is that Warlord Games contacted me to write and article in the beginning of September. Of course, I would! After all, visual terrain is always great to play on, even if you do not play well on it. We tend to remember the cool looking battles better, anyway.
   So this last Wednesday, Sept. 28, Warlord posted the article I wrote titled "Covering Normandy with Teddy Bear Fur". Sure there are some changes, but that is to be expected in edited. I was asked to provide imagines, so my fellow wargaming friends and I decided to do a massive photo shoot of miniature awesomeness. This way, we could get different miniatures and paint styles represented. Though, I did feel bad about sending 96 photos for the affair. I took about 150 total for that morning. Some were just accidental duplicates or shots that could have been better. So we gave them quite a challenge for a layout, but they did an excellent job! Anyway, here is the link to that article: http://www.warlordgames.com/covering-normandy-in-teddy-bear-fur/


More terrain.

Germans versus British fighting.

Saturday, September 3, 2016

Desert Mat Tutorial and Thoughts


Two Blitzkrieg Tanks in 1/48 scale on my recently completed desert mat.
      For quite awhile, I have been interested in the Deserts of North Africa, even though, it is not played as often I would like to see it in our area where Kalissa and I play. I am not really sure why this is. To me, desert warfare has a great potential for some great fast action fun. Of course, most of the time I see desert games, they modeled very simple for battlefields. This is not really a big deal, but since I have been upgrading my standards in terrain to play upon, it is only natural that I upgrade my desert stuff. And maybe, this will be an extra push to model a Lawrence of Arabia game. I love that movie!

 
This was my previous board for desert before I started making fixed mats and really using teddy bear fur. There is nothing wrong with this. I can still use this for my smaller scale stuff.

     So from going to the image just above to the first picture results, I went the teddy bear fur route. There were two main reasons for this. One, I can make a more convincing mat if everything is fixed. Two, it is way easier to clean up when you are on the go. This is especially true for people who travel to gaming halls and then, having to leave in a hurry for non-game related issues. "I was having so much fun, I forgot to pick up my daughter, Sally!"

     Much like the tools used in the first tutorial I did for working with teddy bear fur, the same does apply for the most part. I have learned a thing or two over making hard textures that get the job done, especially when making larger areas of open ground. So below are the list of things needed for this desert project.

  1. Your Teddy Bear Fur base. This is the fabric that is the mat. You can use a medium brown like I did, but for the desert, lighter might just be better.
  2.  A trusty comb! This is still one of the best tools!
  3.  An electric shaver for dog grooming. The ones for your facial hair is not going to cut as well.
  4.  Sand. This will be the base texture.
  5.  3M 45 Adhesive or something similar to that.
  6.  Spray paint for your base color. Satin or flat.
  7.  Accent Spray for texture. You can find this in the same department as the spray paint.
  8.  Acrylic Paints.
  9.  Scissors.
  10.  Brushes. 

    Now, the first thing I do, is make or draw out a plan. If you do not have a plan, make one. It is the same with the regular terrain mat. This one was fairly simplistic, since I was only have scattered brush. Be that as it may, if you don't plan that simple detail on a drawn map, you might end up with open country on one side of the board. After all, you want some basic balance without the need of buildings or trees, unless that is the only plan for the mat. 
    The first step for preparation was to usually comb out all the access fur! The good news is that we can actually skip that step. Instead, you are going to do something just as long winded: Shaving! If you have a drawn out plan, I would start but cutting the shaped areas on were your main clumps of grass are going to be. From there, you can continue to the cut fest to the rest of the open areas. You do not have to cut deep to start this. You want to do this in layers to prevent your shaver from getting hung up on a clump of fur. Have a trash can nearby to comb off the access fur into. It will later save on clean up time. When you get to the lower layers, cut in a circular motion to eliminate the squared off cut lines. *Important to know: If you accidentally cut a hole in the fabric due to the fun, this is not the end of the world. I use Flex Seal to patch up same holes. You can texture and paint over this. If it is between grass tuffs, you might just be able to hide it with awesomeness. Since this is a desert project, use the white Flex Seal.

The first twenty minutes of shaving. I drew out my plan as I went along and cut the individual planned tuffs. 
     Once you have shaved down the main areas, you can work on the individual tuffs and grasses. I cut these in two ways. One way, is shaving it. I cut with a shaver for larger gaps, but can do this with smaller ones. Or there is the more controlled way of cutting shapes and paths with scissors. I do both, and most likely, no one is going to know the difference by the end product!
     After cutting all that is needed based on your plan, it is time for some paint. It seems early, but there is a reason. In this project, I sprayed down the open areas with a Satin Ivory White spray paint by Home Accents. I, also, sprayed Tan Stone Texture as well. The white is there to reduce the coverage needed for your final paint. The texture is there to reduce the parallel line affect the shaved down areas leaves so you do not have the fabric look. Of course, adding sand later, will do this, too. The based paint is there for the years of playing. If sand wares off in some spots over the years of playing, you are not left with a random color patch in the middle of your mat.
     Be sure to spray fairly close, outside, and preferably not a windy day! Also, be sure to shake the textured paint hard for about two minutes. This will make sure the texture is fluid enough to spray through the nozzle. If you don't, it can clog the nozzle making the whole can useless. 

      
I did not dare go between the grasses. I can do these areas with a paint brush.

   
    After that has a chance to dry, you can move to the sand part of the mat. When I say dry, the mat can be tacky to the touch. This is fine, since the next step is to spray over the open areas again with an adhesive. I use 3M 45, because it is cheap and easy to find. You can go stronger. When you spray down the mat in square foot section, pour whatever sand on top. The more the merrier! The weight will help the sand stick more. You will do these throughout the board and let it sit. I give in 30 minutes in the sun, or in my case two hours in the shade during a tropical storm.


Added sand!
      When it seems to be dry, lift the mat for end spilling the sand to the other. This way, you can collect the sand for future projects or be able to easily sweep it up in case you need to reapply in an area or two. Shake out the mat to release loose sand. At this point, you should be ready to paint.

Mostly painted. Using a dark color fur, it worked in my favor. However, lighter fur might also benefit for desert and arid mats.
      At this point, I use  acrylic paints. They are easy to find and fair cheap. The name of the game is little is more. Now, the grass tuffs may have gained some adhesive spray along the edges. You could either trim this with scissors before or after. There is little difference since I trim at the end anyway. I started out with a grey and a green mix to cover the grass spots. You will want to paint a few grass clumps and then, comb through it. This will evenly spread the color, prevent paint clumps, and break up some adhesive glued spots. The darker colors makes the grass pop against the lighter color of the board. This also happens this way in nature as well. I use lighter white colors for the base. I use a larger cheap brush to go over the sand. Dry brush, dap paint, and/or paste on color, the choice is yours. There will be sand that comes off during this process, but the rest will seal more to the mat with the drying of the paint. You can dry brush between the grass and add highlights to the grass. Trim off glued blades and cut the grass to give the impression of rounded off grasses. The end results should be similar to the photo directly below.

This was the basic look I was going for.

I added my wife's British Infantry for scale purposes. The grass can be used as basic light cover.

Some tanks.

Another larger view.

This was an example of what I was aiming for.*
      As some after thoughts, this mat is not truly finished, because I will be adding more details. Some other additional things that can add flavor would to add scenic tuffs, smaller pebbles, and small weeds with super glue. It does stay after countless folding and rolling. The choice is yours! Also, keep in mind that when working with a medium like Teddy Bear Fur, there are always new ways to try it. I never thought of making any desert related anything with fur. But with great planning, practice, and imagination, you can do anything to enhance this hobby of ours.