 |
| Two Blitzkrieg Tanks in 1/48 scale on my recently completed desert mat. |
For quite awhile, I have been interested in the Deserts of North Africa, even though, it is not played as often I would like to see it in our area where Kalissa and I play. I am not really sure why this is. To me, desert warfare has a great potential for some great fast action fun. Of course, most of the time I see desert games, they modeled very simple for battlefields. This is not really a big deal, but since I have been upgrading my standards in terrain to play upon, it is only natural that I upgrade my desert stuff. And maybe, this will be an extra push to model a Lawrence of Arabia game. I love that movie!
 |
| This was my previous board for desert before I started making fixed mats and really using teddy bear fur. There is nothing wrong with this. I can still use this for my smaller scale stuff. |
So from going to the image just above to the first picture results, I went the teddy bear fur route. There were two main reasons for this. One, I can make a more convincing mat if everything is fixed. Two, it is way easier to clean up when you are on the go. This is especially true for people who travel to gaming halls and then, having to leave in a hurry for non-game related issues. "I was having so much fun, I forgot to pick up my daughter, Sally!"
Much like the tools used in the first tutorial I did for working with teddy bear fur, the same does apply for the most part. I have learned a thing or two over making hard textures that get the job done, especially when making larger areas of open ground. So below are the list of things needed for this desert project.
- Your Teddy Bear Fur base. This is the fabric that is the mat. You can use a medium brown like I did, but for the desert, lighter might just be better.
- A trusty comb! This is still one of the best tools!
- An electric shaver for dog grooming. The ones for your facial hair is not going to cut as well.
- Sand. This will be the base texture.
- 3M 45 Adhesive or something similar to that.
- Spray paint for your base color. Satin or flat.
- Accent Spray for texture. You can find this in the same department as the spray paint.
- Acrylic Paints.
- Scissors.
- Brushes.
Now, the first thing I do, is make or draw out a plan. If you do not have a plan, make one. It is the same with the regular terrain mat. This one was fairly simplistic, since I was only have scattered brush. Be that as it may, if you don't plan that simple detail on a drawn map, you might end up with open country on one side of the board. After all, you want some basic balance without the need of buildings or trees, unless that is the only plan for the mat.
The first step for preparation was to usually comb out all the access fur! The good news is that we can actually skip that step. Instead, you are going to do something just as long winded: Shaving! If you have a drawn out plan, I would start but cutting the shaped areas on were your main clumps of grass are going to be. From there, you can continue to the cut fest to the rest of the open areas. You do not have to cut deep to start this. You want to do this in layers to prevent your shaver from getting hung up on a clump of fur. Have a trash can nearby to comb off the access fur into. It will later save on clean up time. When you get to the lower layers, cut in a circular motion to eliminate the squared off cut lines. *Important to know: If you accidentally cut a hole in the fabric due to the fun, this is not the end of the world. I use Flex Seal to patch up same holes. You can texture and paint over this. If it is between grass tuffs, you might just be able to hide it with awesomeness. Since this is a desert project, use the white Flex Seal.
 |
| The first twenty minutes of shaving. I drew out my plan as I went along and cut the individual planned tuffs. |
Once you have shaved down the main areas, you can work on the individual tuffs and grasses. I cut these in two ways. One way, is shaving it. I cut with a shaver for larger gaps, but can do this with smaller ones. Or there is the more controlled way of cutting shapes and paths with scissors. I do both, and most likely, no one is going to know the difference by the end product!
After cutting all that is needed based on your plan, it is time for some paint. It seems early, but there is a reason. In this project, I sprayed down the open areas with a Satin Ivory White spray paint by Home Accents. I, also, sprayed Tan Stone Texture as well. The white is there to reduce the coverage needed for your final paint. The texture is there to reduce the parallel line affect the shaved down areas leaves so you do not have the fabric look. Of course, adding sand later, will do this, too. The based paint is there for the years of playing. If sand wares off in some spots over the years of playing, you are not left with a random color patch in the middle of your mat.
Be sure to spray fairly close, outside, and preferably not a windy day! Also, be sure to shake the textured paint hard for about two minutes. This will make sure the texture is fluid enough to spray through the nozzle. If you don't, it can clog the nozzle making the whole can useless.
 |
| I did not dare go between the grasses. I can do these areas with a paint brush. |
After that has a chance to dry, you can move to the sand part of the mat. When I say dry, the mat can be tacky to the touch. This is fine, since the next step is to spray over the open areas again with an adhesive. I use 3M 45, because it is cheap and easy to find. You can go stronger. When you spray down the mat in square foot section, pour whatever sand on top. The more the merrier! The weight will help the sand stick more. You will do these throughout the board and let it sit. I give in 30 minutes in the sun, or in my case two hours in the shade during a tropical storm.
 |
| Added sand! |
When it seems to be dry, lift the mat for end spilling the sand to the other. This way, you can collect the sand for future projects or be able to easily sweep it up in case you need to reapply in an area or two. Shake out the mat to release loose sand. At this point, you should be ready to paint.
 |
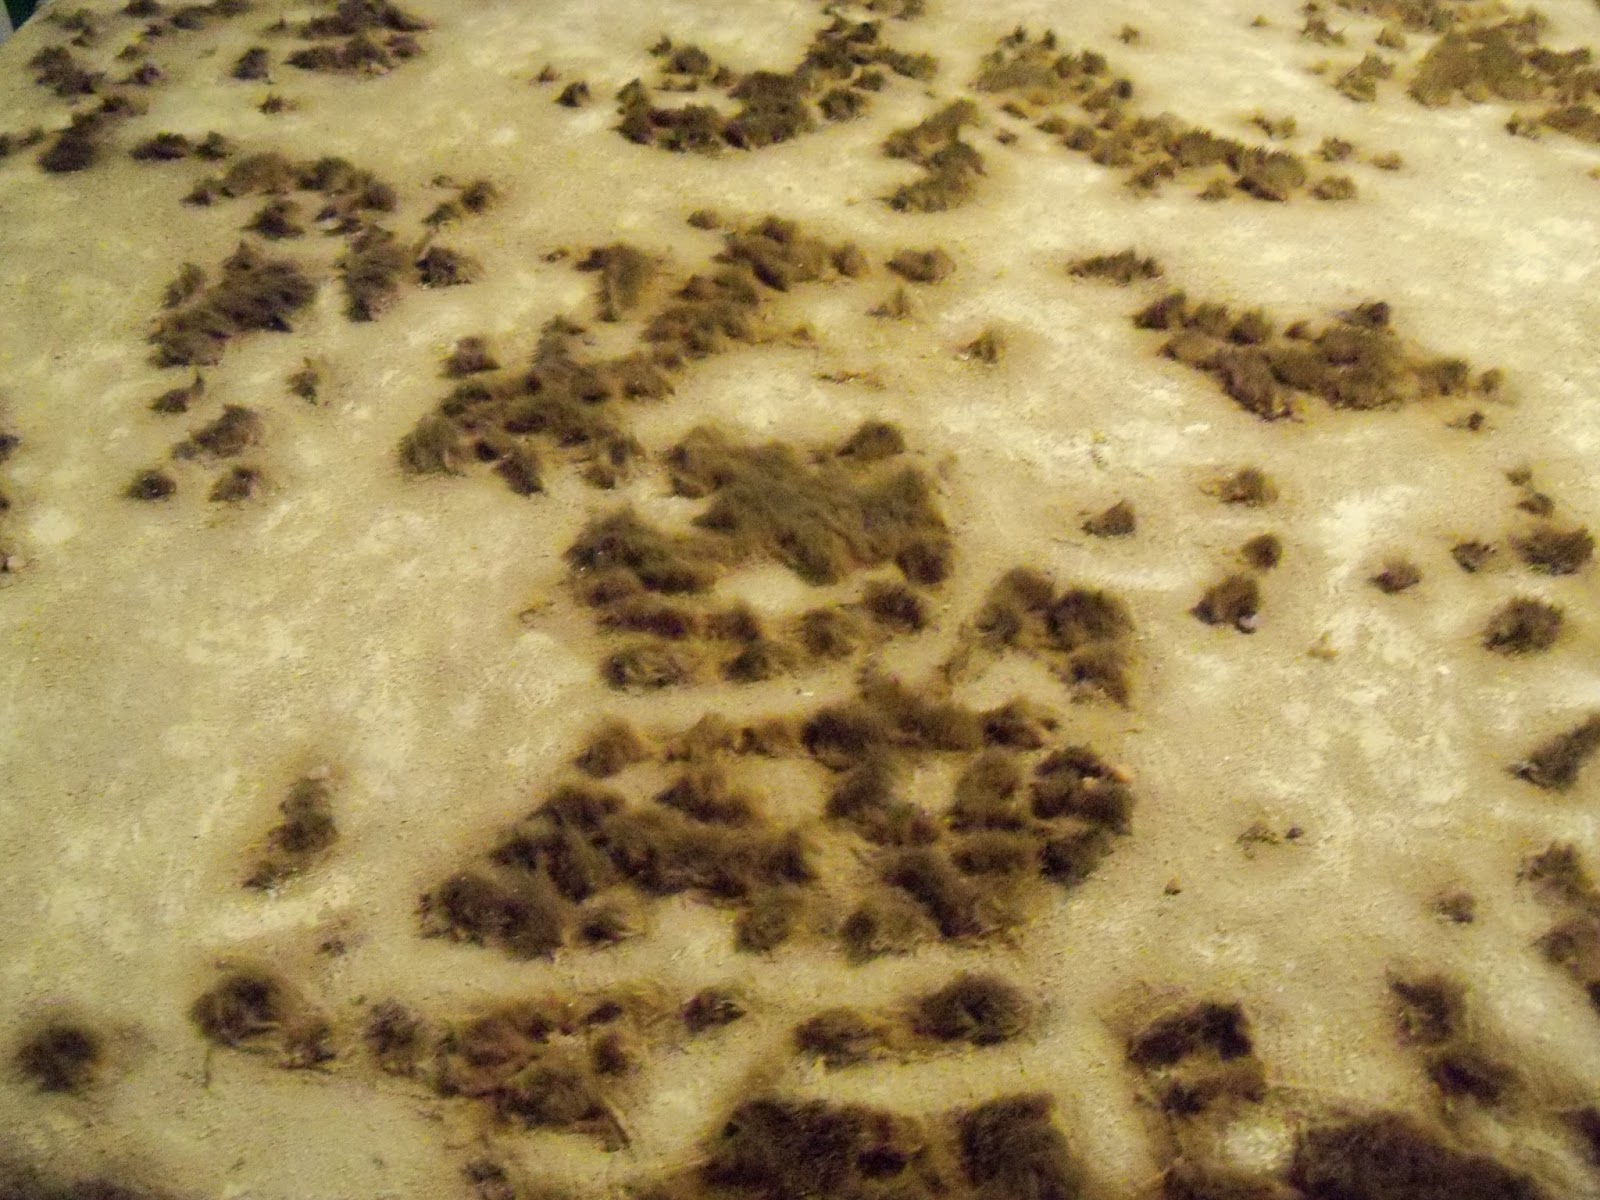
| Mostly painted. Using a dark color fur, it worked in my favor. However, lighter fur might also benefit for desert and arid mats. |
At this point, I use acrylic paints. They are easy to find and fair cheap. The name of the game is little is more. Now, the grass tuffs may have gained some adhesive spray along the edges. You could either trim this with scissors before or after. There is little difference since I trim at the end anyway. I started out with a grey and a green mix to cover the grass spots. You will want to paint a few grass clumps and then, comb through it. This will evenly spread the color, prevent paint clumps, and break up some adhesive glued spots. The darker colors makes the grass pop against the lighter color of the board. This also happens this way in nature as well. I use lighter white colors for the base. I use a larger cheap brush to go over the sand. Dry brush, dap paint, and/or paste on color, the choice is yours. There will be sand that comes off during this process, but the rest will seal more to the mat with the drying of the paint. You can dry brush between the grass and add highlights to the grass. Trim off glued blades and cut the grass to give the impression of rounded off grasses. The end results should be similar to the photo directly below.
 |
| This was the basic look I was going for. |
 |
| I added my wife's British Infantry for scale purposes. The grass can be used as basic light cover. |
 |
| Some tanks. |
 |
| Another larger view. |
 |
| This was an example of what I was aiming for.* |
As some after thoughts, this mat is not truly finished, because I will be adding more details. Some other additional things that can add flavor would to add scenic tuffs, smaller pebbles, and small weeds with super glue. It does stay after countless folding and rolling. The choice is yours! Also, keep in mind that when working with a medium like Teddy Bear Fur, there are always new ways to try it. I never thought of making any desert related anything with fur. But with great planning, practice, and imagination, you can do anything to enhance this hobby of ours.


At the moment, I do not have a full picture of it, bu probably will when we play a desert game. Though, most of the mats I make are all 5'X 6'. The largest mat I've done using fur so far in one piece is a 6'x 12' table.
ReplyDeleteI'm only 18 months late and just read this, a fantastic tutorial, thanks very much for posting it. I've used decorators caulk on a mat but it's sticky holding power is ok but not great, I never thought of using spray glue, dough.
ReplyDeleteCheers
stunning! Awsome... have no words to express my feelings. This is the best terRain-MAT I could ever dream of [Not in my wildest fantasies !!!]. thank you for the inspiration
ReplyDeleteThat looks amazing. Best looking desert mat I have ever seen. Bookmarking for future reference.
ReplyDeleteI really need this kind of information and must share with my circle. Thanks for sharing with us.
ReplyDelete